Link Voicemate To Zapier
Voice Mate is a powerful voicemail assistant designed to help you manage missed calls efficiently. However, manually handling voicemail notifications and follow-ups can be time-consuming, especially if you receive a high volume of calls. That’s where automation comes in. By integrating Voice Mate with Zapier, you can seamlessly connect your voicemail assistant with thousands of other apps—without writing a single line of code.
Zapier acts as a bridge between different applications, allowing you to automate workflows that trigger specific actions whenever a voicemail is received. This means that every voicemail can automatically set off a chain of events based on your unique needs. For example, you can configure Voice Mate and Zapier to send voicemail transcripts to Slack, create follow-up tasks in Trello, or log call details in a CRM such as HubSpot. Instead of spending time manually transferring voicemail details, you can focus on what matters—engaging with your clients and keeping your operations running smoothly. One of the biggest advantages of this integration is its flexibility. Whether you run a small business, manage a customer support team, or work in sales, Zapier ensures that your voicemails are never lost in the shuffle. Missed calls can instantly turn into action items, helping you stay organized and responsive.
In this guide, we’ll walk you through the step-by-step process of connecting Voice Mate with Zapier. By the end, you’ll have a fully automated voicemail workflow that helps you save time, reduce manual tasks, and enhance your overall efficiency.
Getting Started
Setup is super easy, simply follow the steps below to get started. You will need a Voice Mate account. If you don't have one you can register here:
Open Voice Mate account
-
1. Create a New Zap in Zapier
Log in to your Zapier account. Click on “Create a Zap.” This will start a new automation sequence where Voice Mate will act as the trigger.
-
2. Select Webhook as the Incoming Trigger
In the “Choose App & Event” section, select “Webhooks by Zapier.”Choose 'Catch Hook' as the trigger event. Click Continue.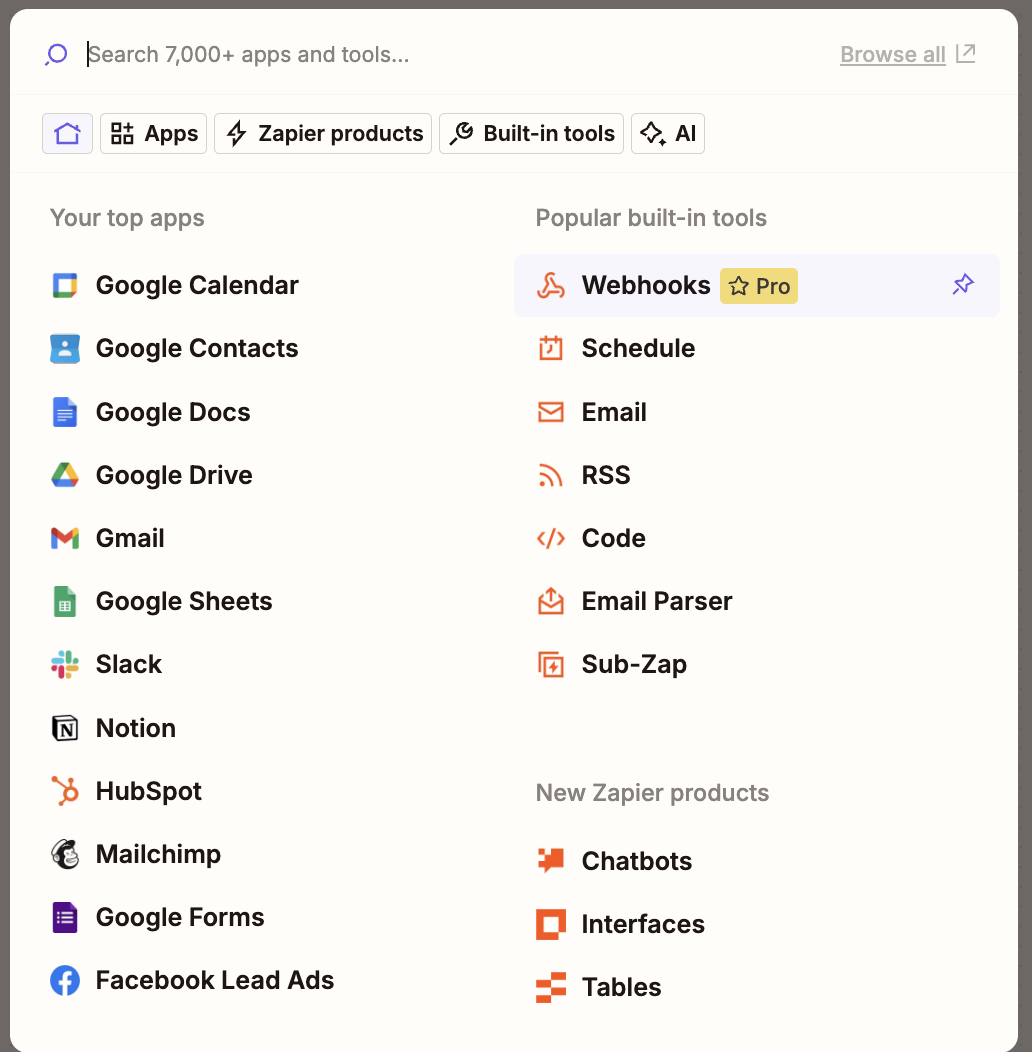
-
3. Configure the Webhook URL in Zapier
Zapier will generate a unique Webhook URL. Copy this URL—you’ll need it in the next step.
-
4. Open Voice Mate and Navigate to Third-Party Integrations
Open the Voice Mate app. Go to Settings > Third-Party Integrations. Look for the Zapier integration section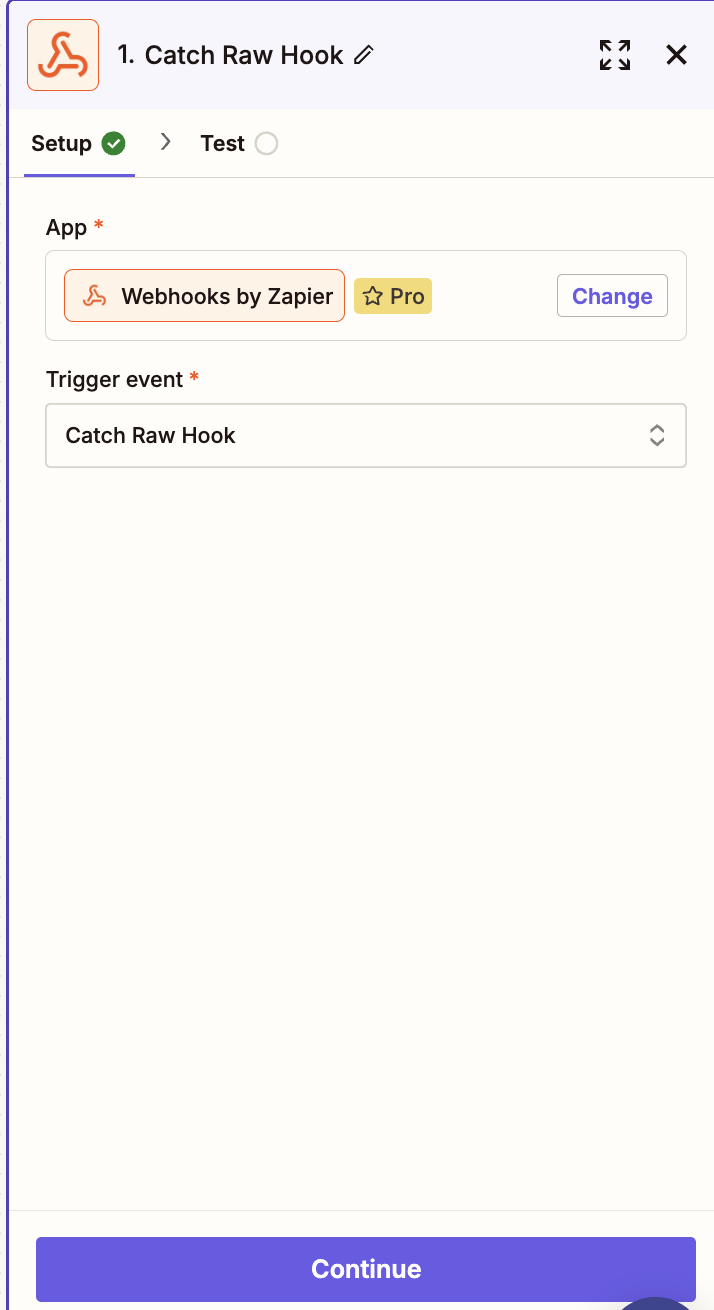
-
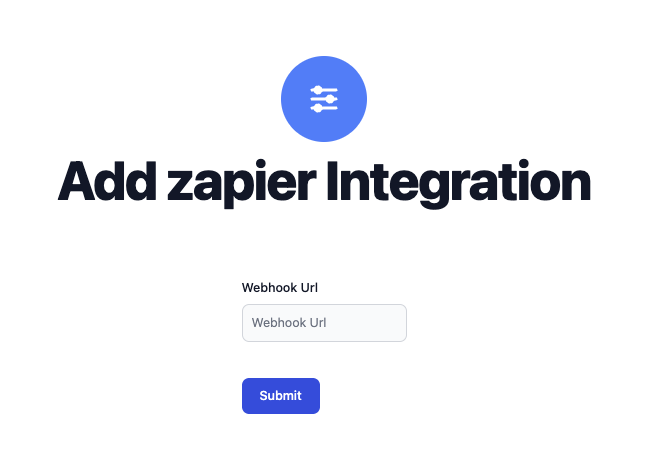
5. Paste the Webhook URL into Voice Mate
In the Zapier integration settings, find the field to enter a Webhook URL. Paste the URL you copied from Zapier. Click Save.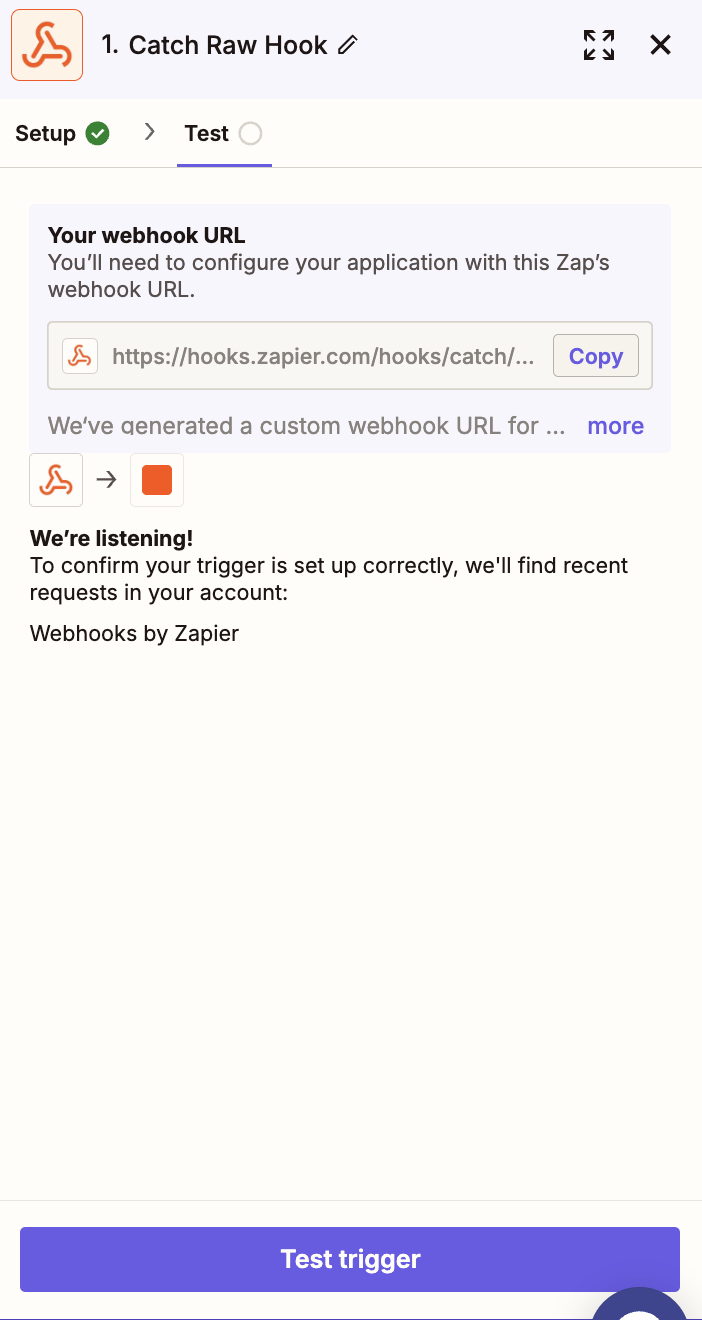
-
6. Test the Connection
Go back to Zapier and click “Test Trigger.” Make a test voicemail call to ensure Zapier receives the data. If successful, you’ll see the test data appear in Zapier.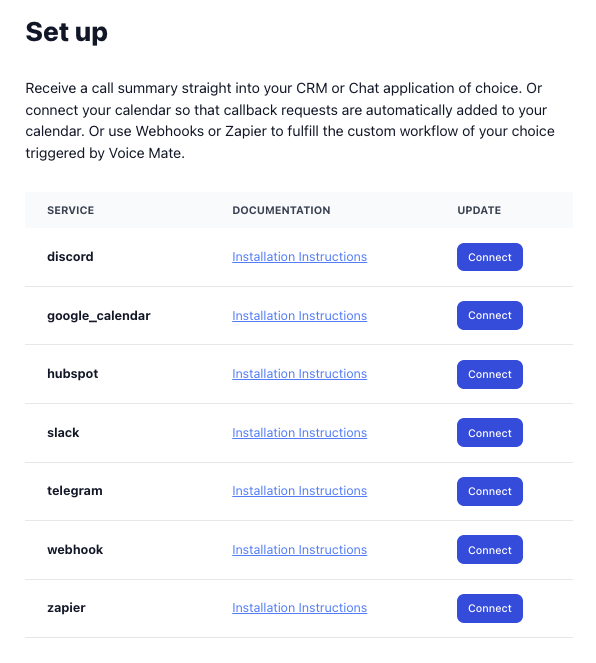
-
7. Choose the Action for Your Workflow
Now that Zapier can receive Voice Mate data, select what should happen next. You can connect to apps like Slack, Trello, Google Sheets, HubSpot, or Gmail.Choose the desired action, such as sending a Slack message or creating a new CRM entry.